Connecting Rubber Hose Fittings: A Step-by-Step Guide
Rubber hose fittings are essential components for joining and securing rubber hoses in various fluid transfer applications. Properly connecting rubber hose fittings is critical to ensure leak-free and reliable fluid conveyance. Here's a step-by-step guide to connecting rubber hose fittings to components:
Inspection and Preparation: Before connecting the fittings, inspect the rubber hose and the fittings for any damage, deformation, or foreign objects. Ensure that the hose and fittings are compatible in terms of size, material, and pressure ratings. Trim the hose to the required length and remove any debris or contaminants from the hose ends and the fitting surfaces.
Assembly of Fittings: For attaching fittings to rubber hoses, apply a thin layer of lubricant or assembly grease to the hose barbs and the internal surface of the hose. This facilitates the insertion of the hose onto the fitting and reduces the risk of damage to the hose during assembly.
Hose Insertion: Carefully slide the hose onto the fitting's barbed end, ensuring that the hose is fully seated against the fitting's shoulder. Use a twisting motion while applying gentle pressure to ease the hose onto the fitting. Avoid excessive force that could damage the hose or the fitting.
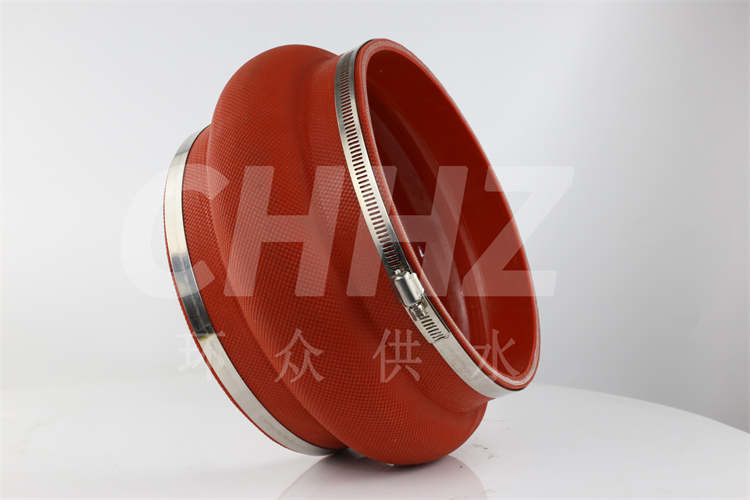
Clamp Installation: Once the hose is properly fitted onto the barb, use hose clamps or other appropriate securing devices to hold the hose in place. Position the clamps approximately 1/4 to 3/8 inch away from the end of the hose to ensure a secure grip without interfering with the fitting.
Secure Tightening: Tighten the clamps securely using suitable tools such as screwdrivers or torque wrenches. Ensure that the clamps are tightened uniformly to create an even and secure grip around the hose without causing deformation or damage.
Leak Testing: After the assembly, conduct a visual inspection to verify that the hose and fittings are correctly aligned and securely connected. It's also advisable to conduct a pressure or leak test to ensure that the connection is leak-free and capable of withstanding the intended fluid pressure.
Protection and Documentation: Once the hose fittings are connected, protect the assembly from external damage or environmental factors. Document the assembly process, including details such as date, assembly personnel, and any specific procedures followed, for future reference and maintenance purposes.
In conclusion, proper and meticulous connection of rubber hose fittings to components is critical to achieving a reliable and leak-free fluid transfer system. Following the step-by-step guide outlined above ensures that rubber hose fittings are connected securely and in accordance with best practices, thus contributingto the overall integrity and performance of the fluid conveyance system.